From Amazon DataZone to SageMaker Unified Studio: A Strategic Guide to Blueprints
While the concept of blueprints has existed since AWS DataZone V1, it was mostly reserved for unique capability or custom edge cases rather than everyday features. SageMaker Unified Studio (SMUS)—which runs on top of DataZone domains—completely revamps this approach. Today, blueprints—fundamentally AWS CloudFormation stacks that define infrastructure and tooling—are a core component and the beating heart of any given project.
As specialists in data, cloud, and AI architectures, understanding this structure is essential. The base of a SMUS project follows a clear hierarchy: you choose and enable your blueprints, use them to create a Project Profile, and then use that profile to provision the actual project. (We will dive deeper into project profiles in the next article).
If a project exists in SMUS, there is at least one blueprint behind its project profile. These fall into two main categories: AWS-Managed Blueprints and Custom Blueprints.
Supported managed blueprints offer out-of-the-box configurations that give you:
- Complete baseline capabilities
- Generative AI tools
- SQL analytics
You can find the full list of currently supported managed blueprints in the official AWS documentation.
The Foundation: The Tooling Blueprint
All projects share the same base. By default, any project provisioned on SMUS is backed by a project profile containing at least the default blueprint, which AWS calls the Tooling Blueprint.
This blueprint provisions the required base infrastructure for each project—think IAM roles, security groups, and foundational networking. It is highly customizable via its parameters, allowing it to cover a wide range of use cases.
Important: The Tooling Blueprint must always be enabled in the region where you choose to work. Disabling this blueprint entirely blocks project creation on SMUS.
Enabling the Tooling Blueprint
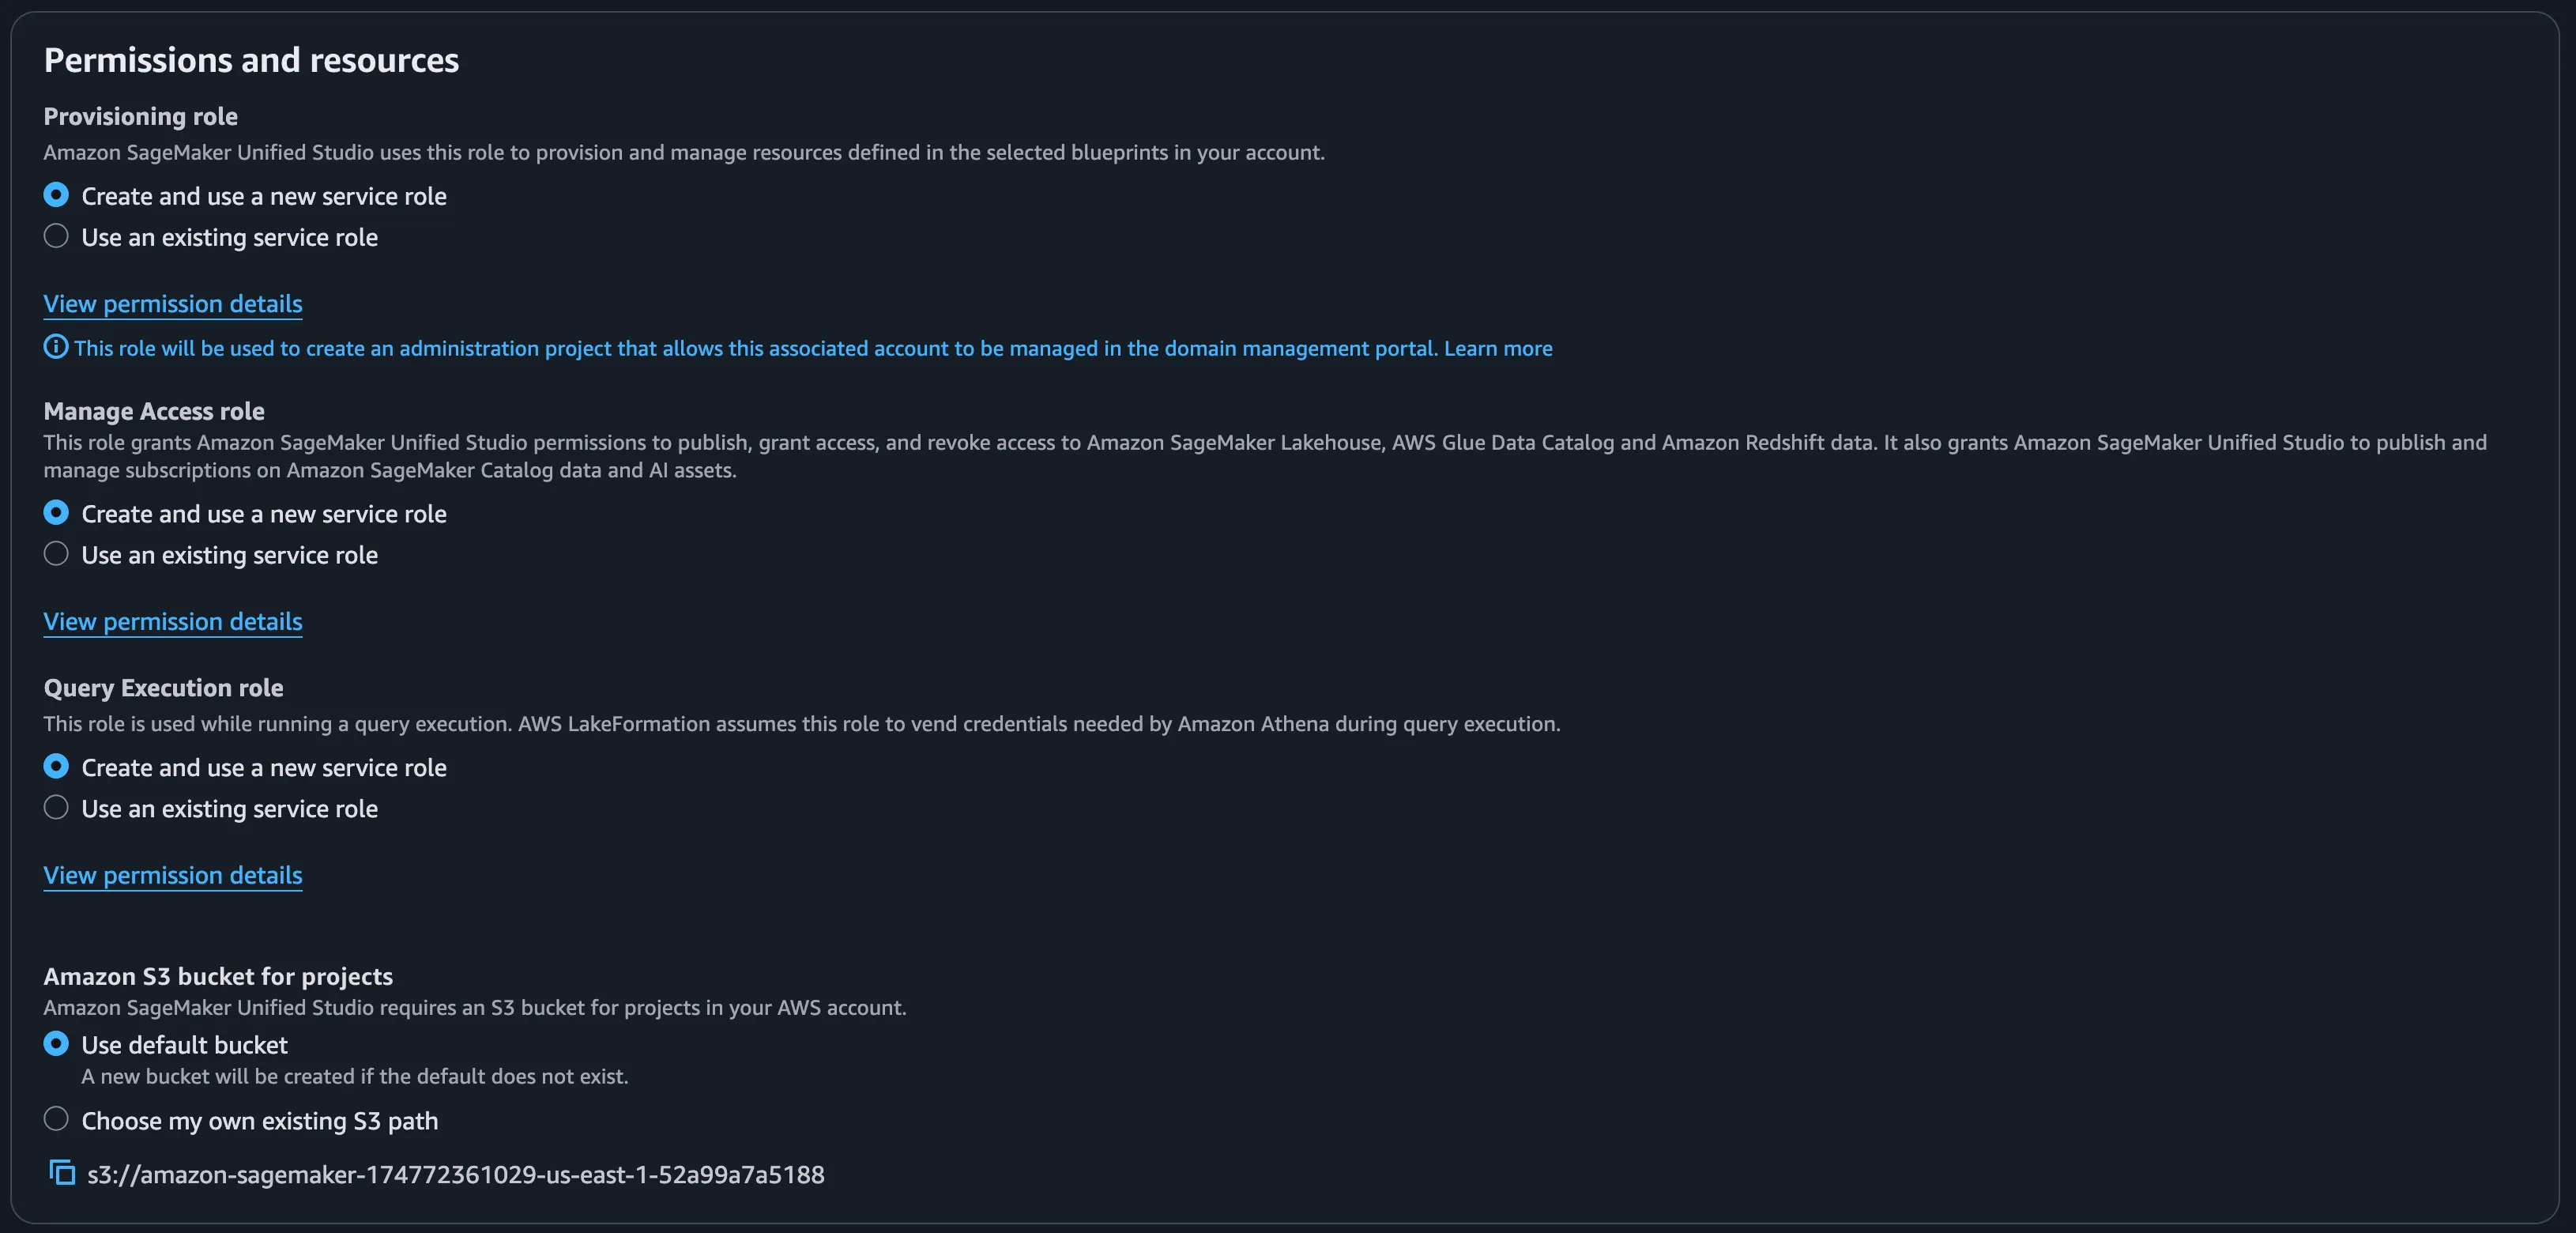
While enabling the tooling blueprint is completely managed by SMUS, you do have the flexibility to bring your own IAM roles and S3 buckets—especially useful if you are enabling it via the API or IAC.
Within the tooling blueprint (and others), you will encounter three critical IAM roles:
- Provisioning Role: Used specifically to provision the blueprint's CloudFormation stack in the local account. If you hit errors during the creation of CFN stacks, check this role first.
- Manage Access Role: Used to handle Lake Formation grants, RAM permission grants, and other operations related to data asset access, publishing, and subscriptions. Investigate this role if you face issues sharing or subscribing to assets.
- Query Execution Role: Used for data exploration using Athena and Redshift connectors inside the SMUS domain.
If you aren't letting SMUS manage your S3 bucket for project storage, ensure your custom bucket follows the same naming conventions if you plan to keep using the managed IAM roles.
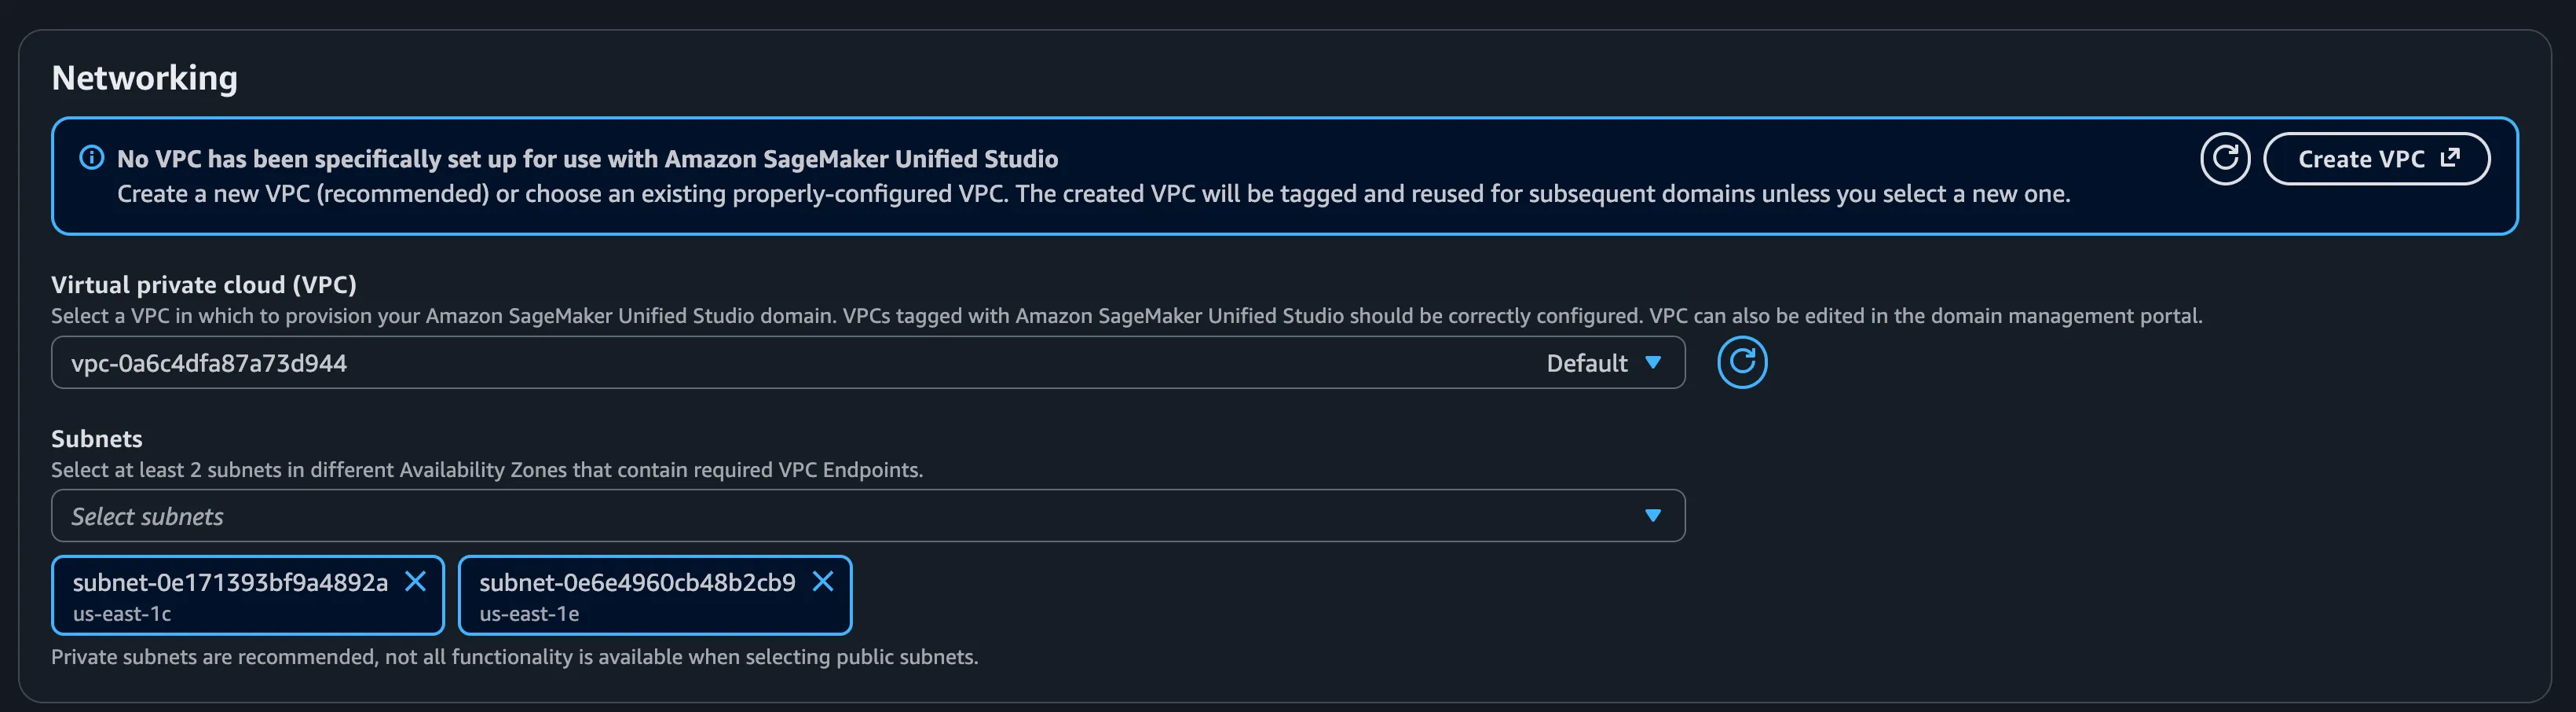
To deploy correctly, projects will also require a VPC and at least two subnets across different Availability Zones (AZs). Compute and storage capabilities related to your enabled blueprints will be provisioned there. You can configure different VPC settings for different blueprints if your architecture requires it.
Under the Hood: Blueprint Technicalities
Technically speaking, a blueprint is simply an AWS CloudFormation stack.
Enabling a blueprint requires a region and a target account, which can optionally be selected during project creation. Blueprint enablement is local to its account. If you have associated domains across multiple accounts or regions, the blueprints must be explicitly enabled in those specific locations to be usable.
When a blueprint is attached to a project profile and used to create a SMUS project, the service provisions that CloudFormation stack in the chosen account and region. You can easily track and verify this blueprint in the CloudFormation console after a successful deployment.
Creating a project in SMUS simply triggers the provisioning of the ensemble of blueprints defined in the project profile. Once the stacks are successfully deployed, the project becomes accessible. While SMUS performs some minor setup actions outside of the blueprints, the core infrastructure is entirely CFN-driven.
Extending Capabilities: Custom Blueprints
On top of the managed capabilities, SMUS gives us the power to create Custom Blueprints. This allows you to enrich projects with tools not listed in the managed catalog, or even completely adapt a managed blueprint to fit your specific data architecture.
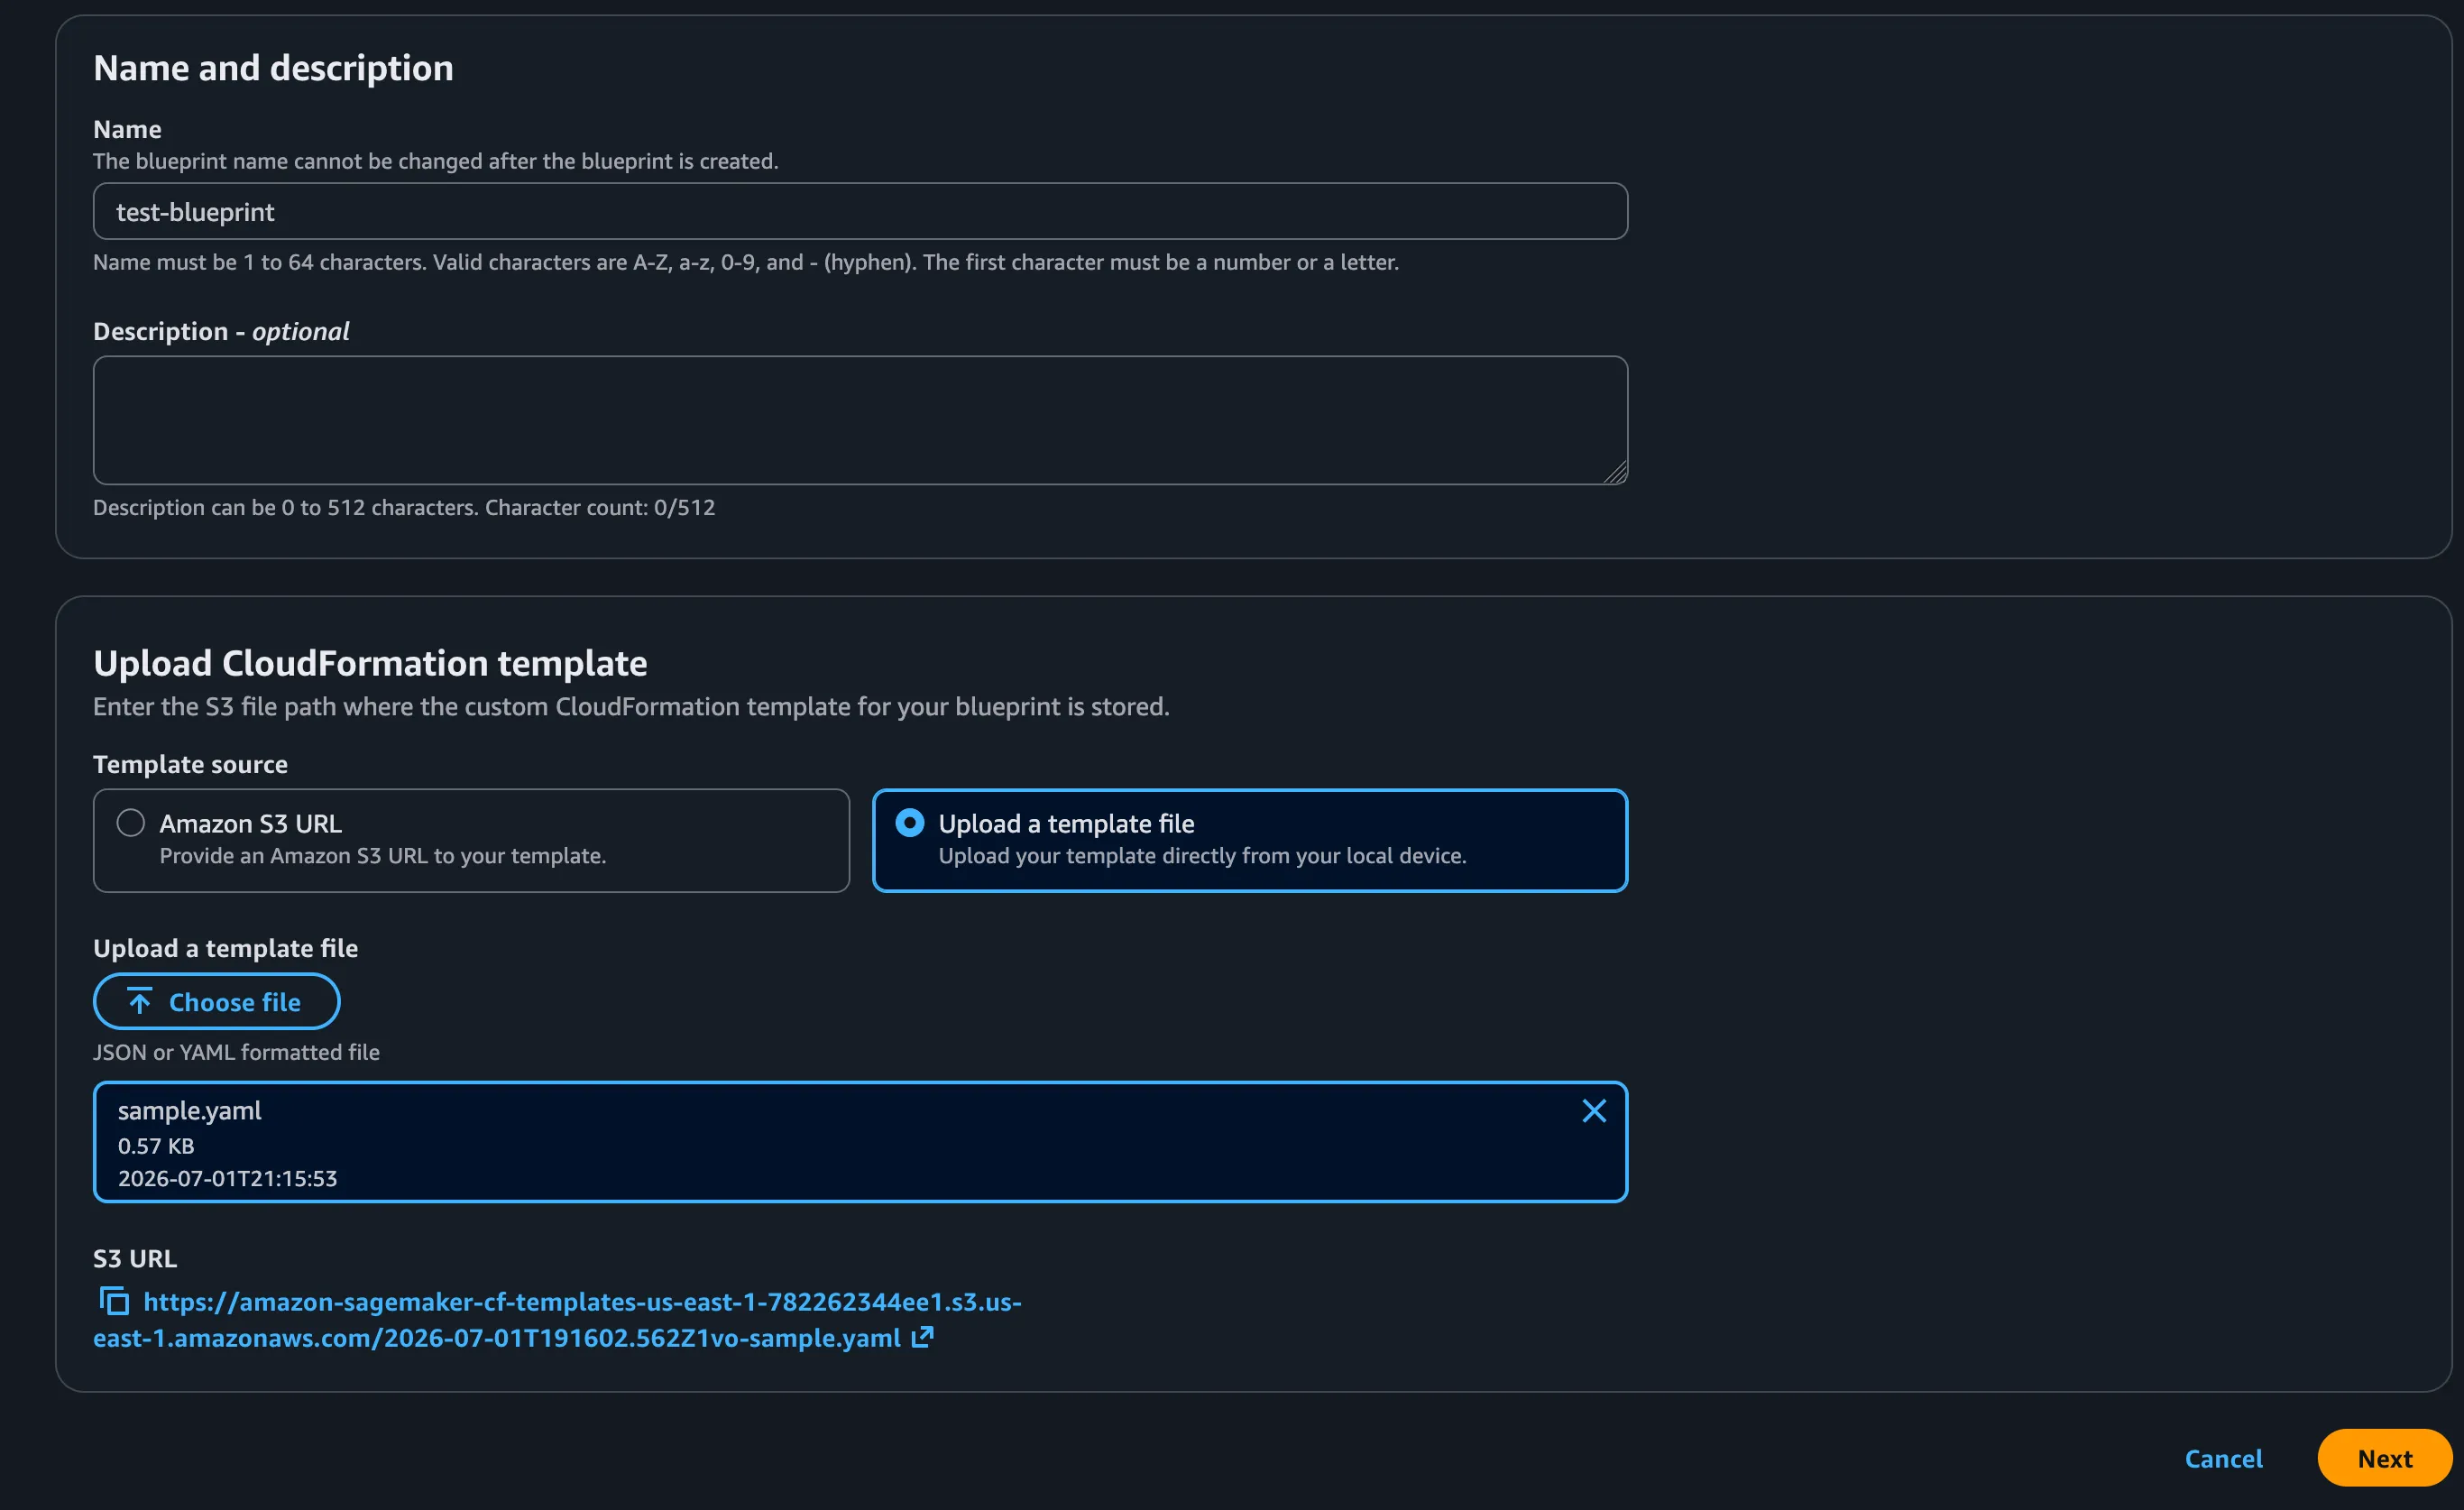
Since custom blueprints are also CloudFormation templates, they must be stored in an S3 bucket. SMUS offers a dedicated bucket for this. If you choose to manage your own bucket, it is highly recommended to respect the default SMUS bucket naming convention. This allows you to keep using the provisioned SMUS IAM roles, as they are pre-authorized to access buckets matching that exact naming pattern.
Important Note on Cross-Account Architectures: If you have cross-account projects, you must manage the bucket policies yourself. When a project is created, the stack is provisioned in the target account, meaning the target account needs cross-account access to the template bucket. Failing to handle these permissions correctly will result in an error stating the project role is not authorized to use the blueprint.
Because custom blueprints are just CFN stacks, you have an infinite range of choices. You can leverage every feature available in CloudFormation—such as custom resources and metadata—to cover almost any automation required during project creation.
The Custom Blueprint Lifecycle
Let's walk through the lifecycle of a custom blueprint, from creation to deletion.
1. Creation
We start by creating a CloudFormation stack. For example, we can use a sample stack containing a basic parameter and an SSM resource. (Note: Ensure your blueprint provisioning IAM role has the necessary permissions, such as ssm:PutParameter, to deploy the resources defined in your template).
Blueprint CFN Sample
Note — SMUS Injected Parameters: During provisioning, SageMaker Unified Studio automatically injects specific contextual parameters into your CloudFormation stack. You can declare and use the following parameters in your blueprint to dynamically reference the domain, project, or environment details—even though they are unknown prior to project creation:
datazoneEnvironmentEnvironmentIddatazoneEnvironmentDomainIddatazoneEnvironmentDomainArndatazoneEnvironmentProjectIddatazoneEnvironmentProjectNamedatazoneScopeNamedatazoneEnvironmentProvisioningRoleArn
Next, head to the SMUS UI:
- Choose the domain where you want to create the blueprint.
- Navigate to the Blueprints tab.
- Click Create.
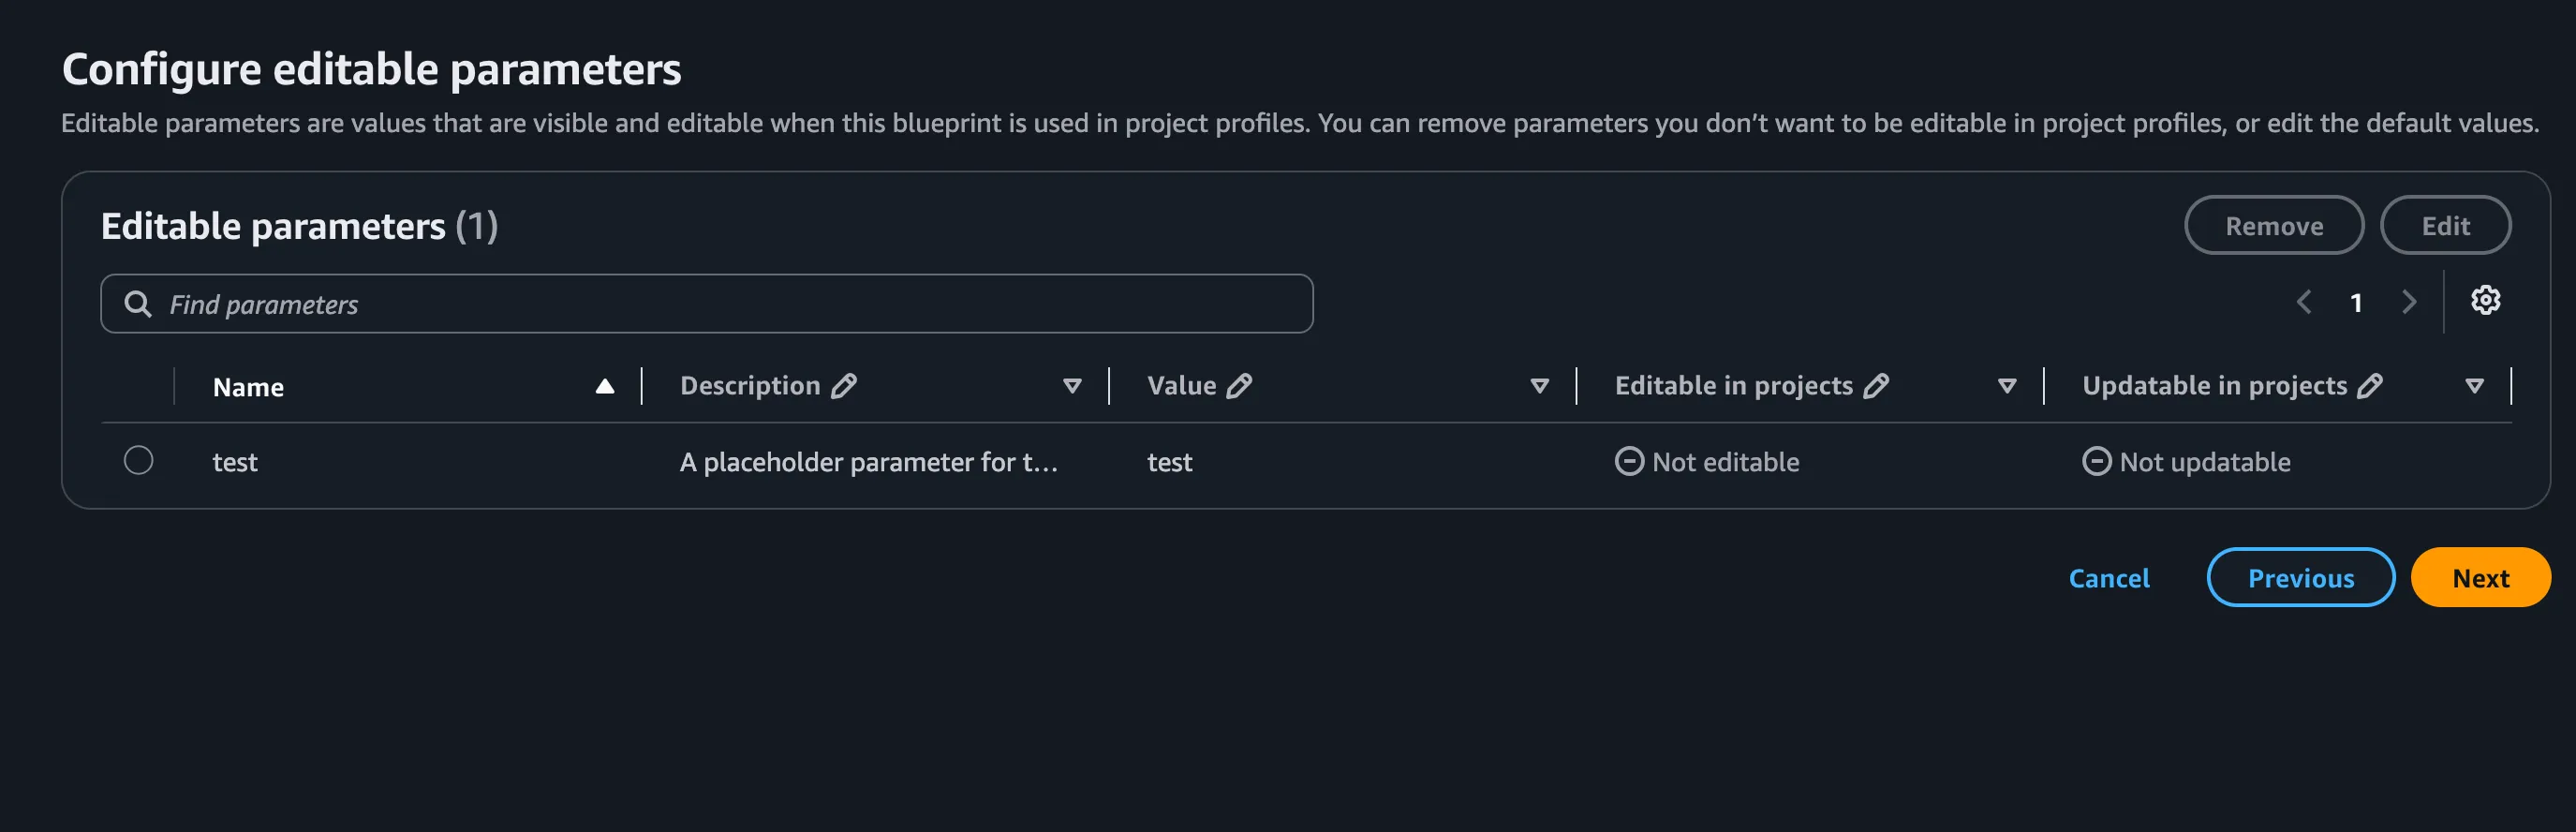
During creation, you have full control over the parameters. You can set default values and specify the immutability of each parameter (e.g., deciding if a parameter can be edited during project creation, or updated afterward). This adds a great layer of governance and access control to your infrastructure scope.
After defining the parameters, you must enable the blueprint. Remember, this custom blueprint requires an IAM provisioning role to fetch the template from your S3 bucket and act as the CloudFormation provisioner. If you are using the SMUS managed role, ensure your bucket naming matches the default convention, or simply bring your own IAM role to handle the deployment.
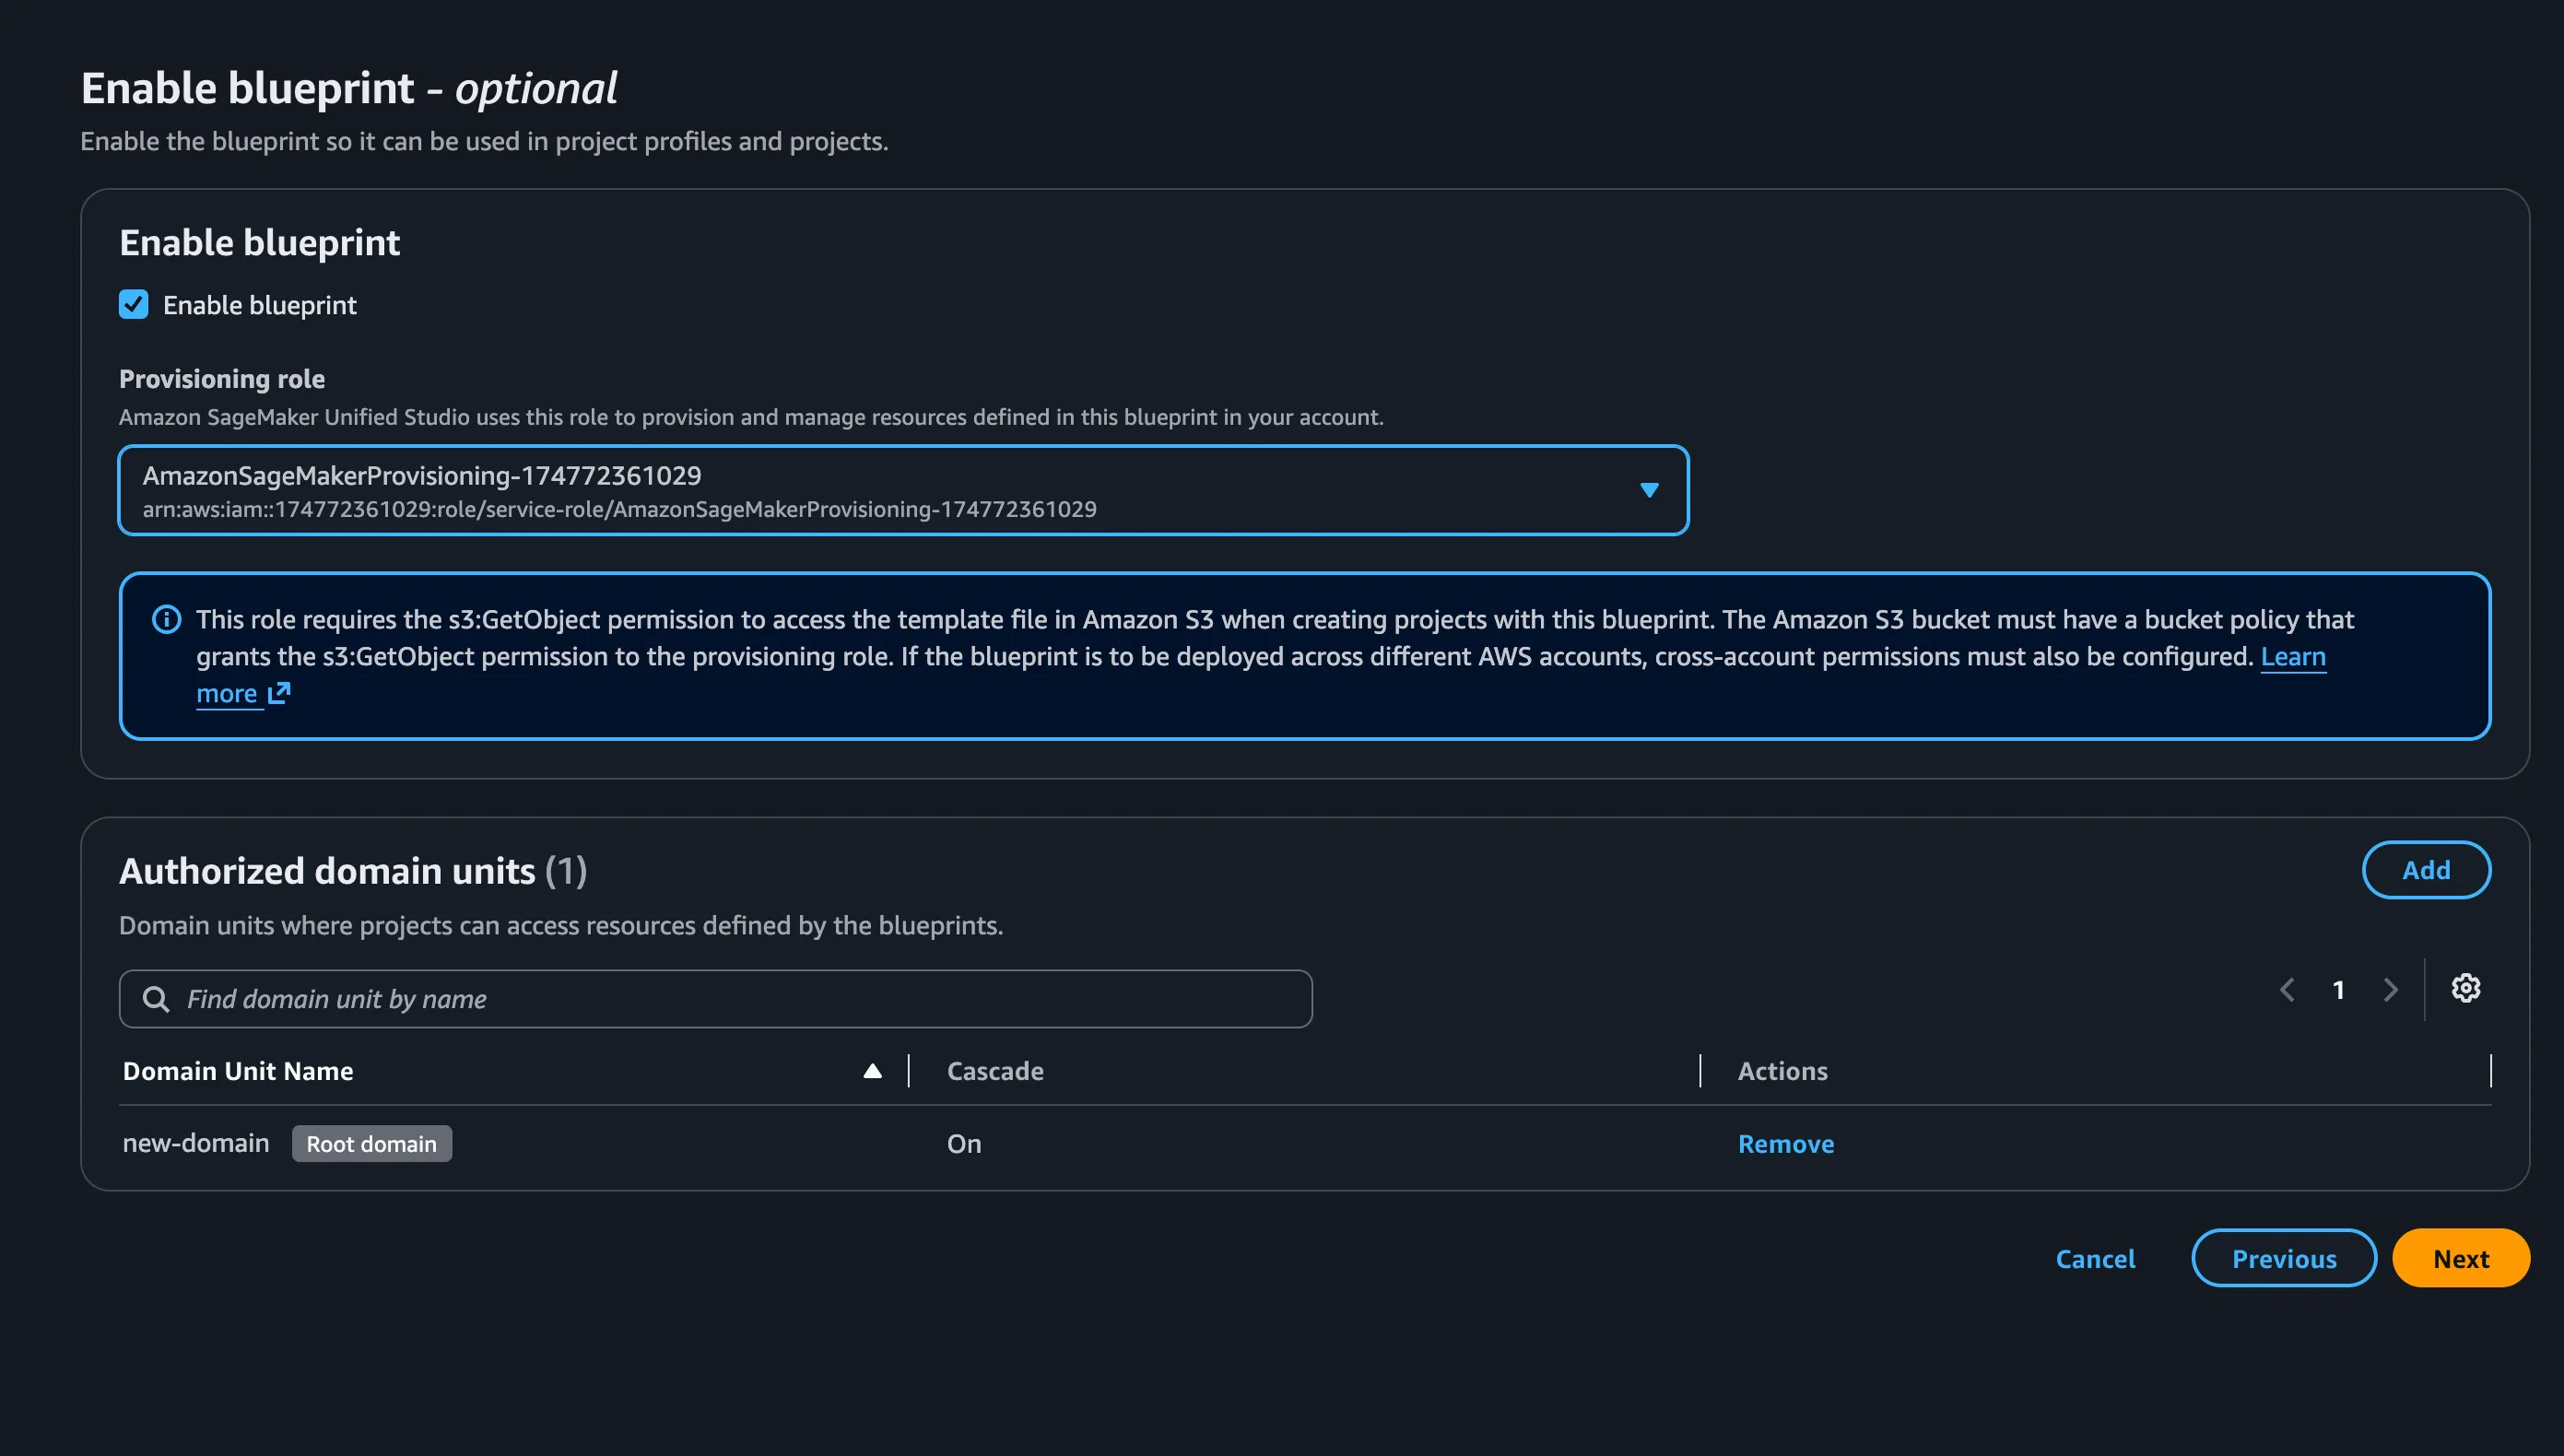
2. Update
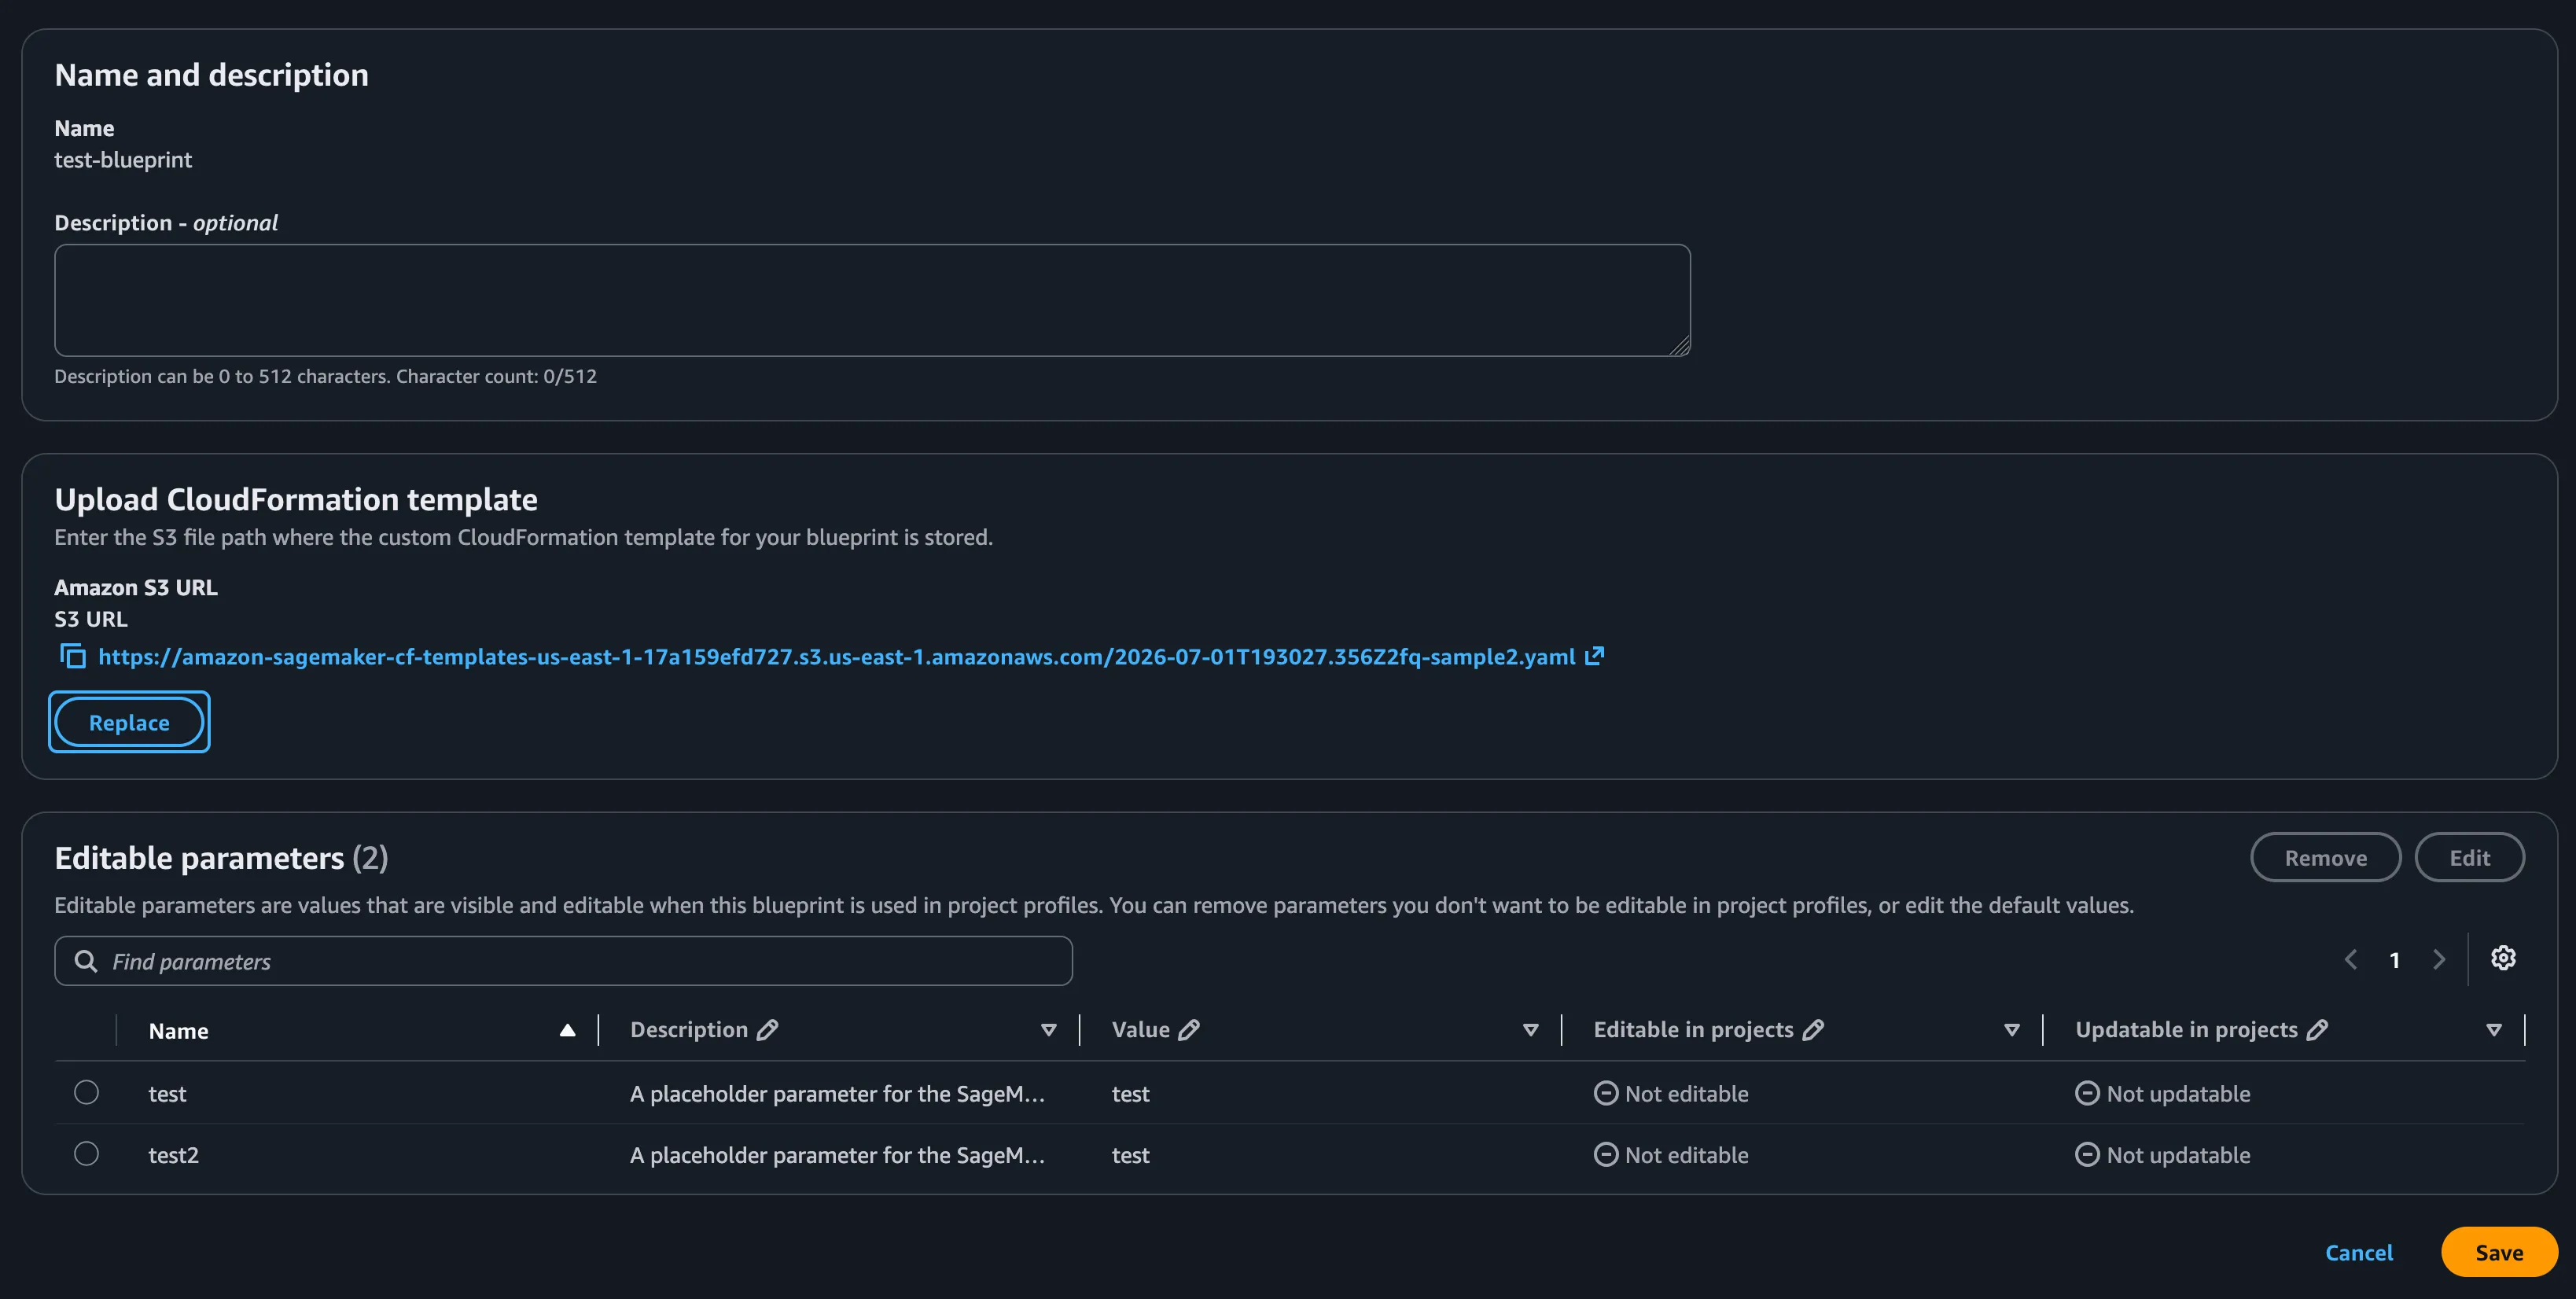
After creation, a blueprint is not set in stone. You can modify its properties, change its CFN definition, adjust parameter configurations, update default values, or rewrite its description. For example, you could easily add a new parameter to your sample template and update the existing blueprint to reflect the new architecture.
3. Deletion
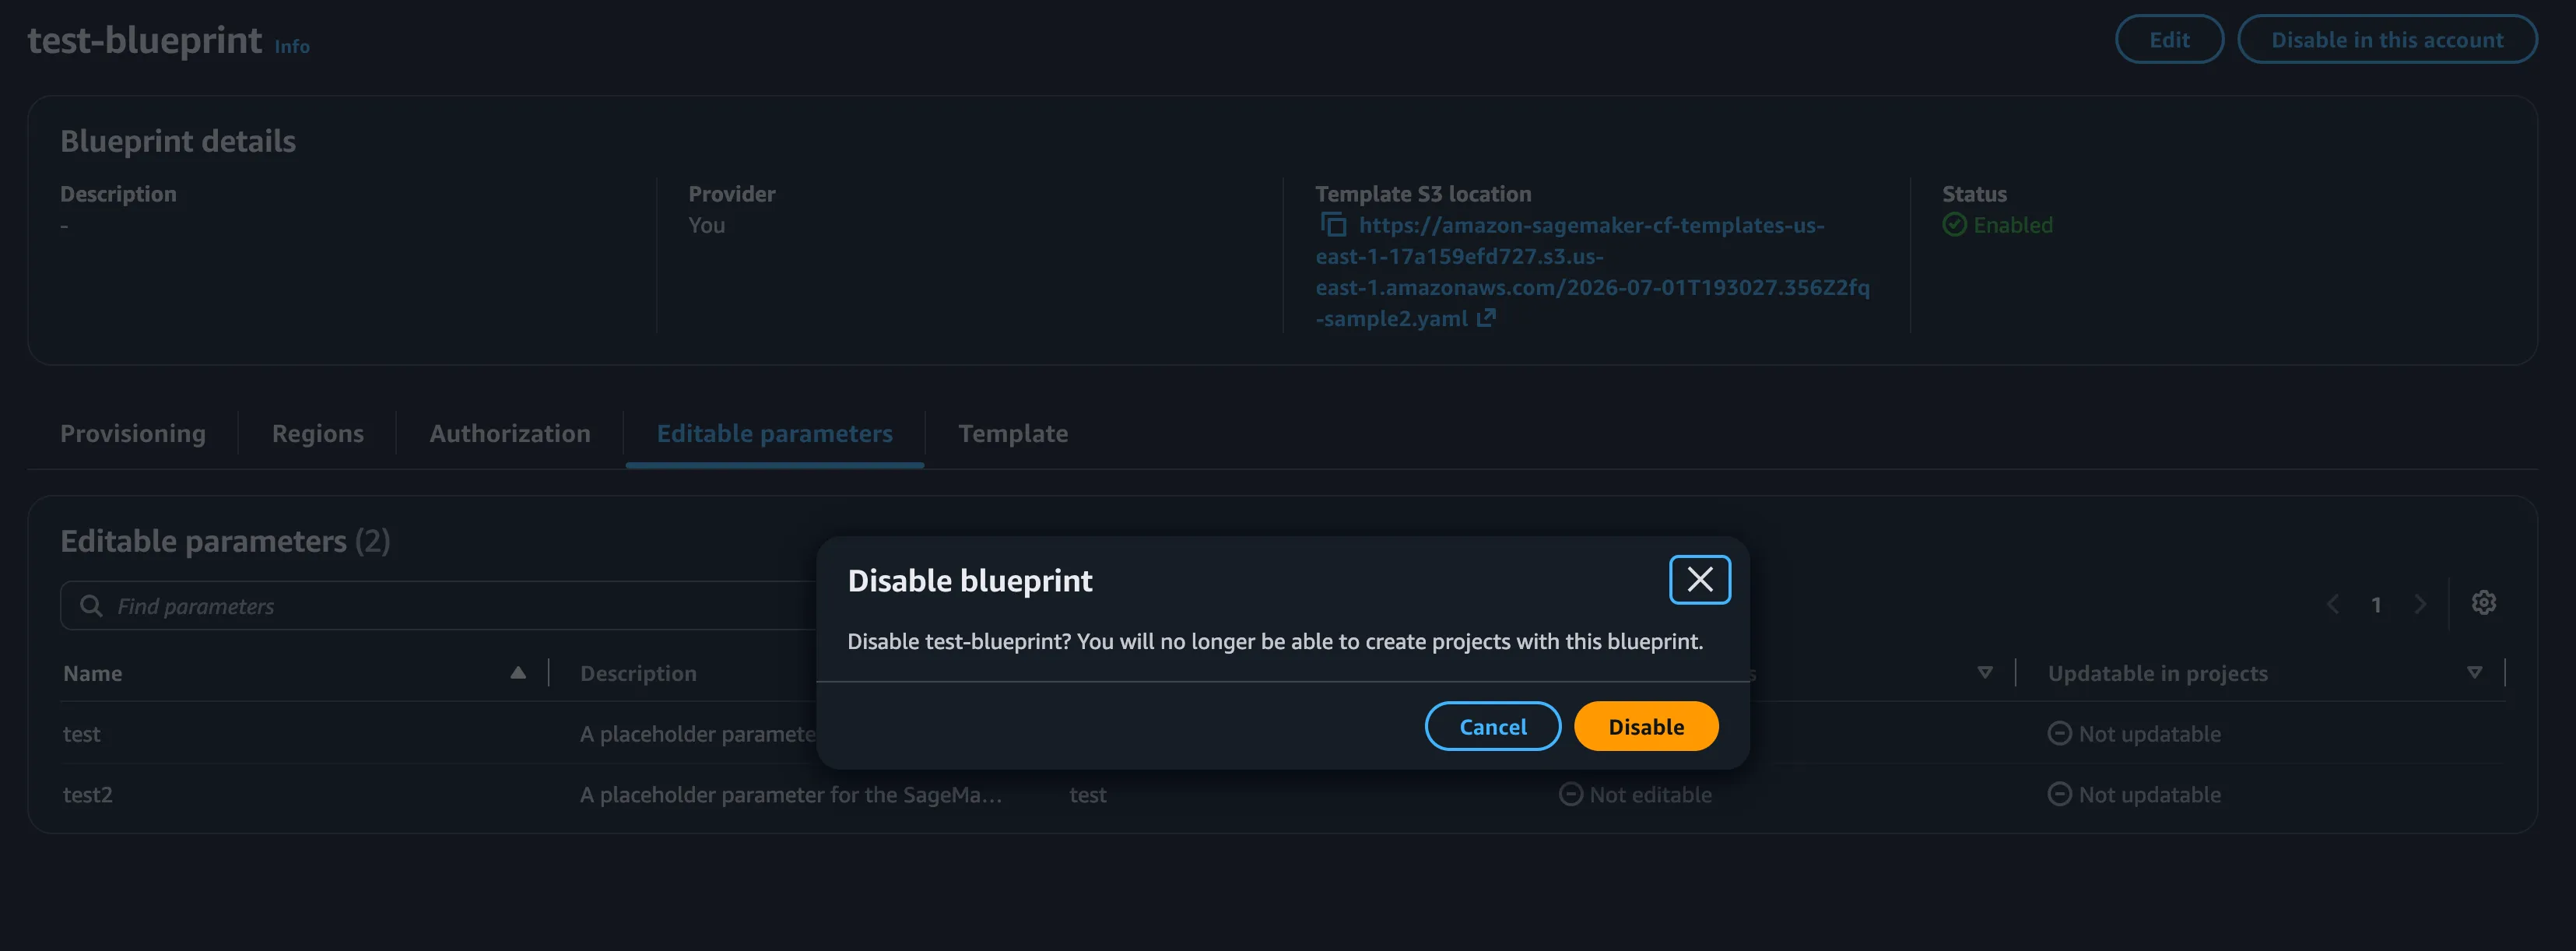
Interestingly, there is currently no "Delete" button for blueprints in the SMUS UI. The deletion of an environment blueprint must be handled programmatically using the DataZone API.
Start by disabling the blueprint:
To delete an environment blueprint, you must provide two things:
- The
domain-identifier(the ID of your DataZone domain). - The
identifier(the ID of the blueprint you want to delete).
You can easily grab the blueprint identifier from your browser URL while on the blueprint's detail page (look for /blueprints/<blueprint_id>), or by querying the DataZone API.